Automated reports in Margill Loan Manager (MLM) streamline your reporting processes by automating report generation, saving, and distribution. Once configured, reports can be produced without manual intervention according to the schedule defined in Windows Task Scheduler, typically outside business hours, freeing up time for higher value-added tasks.
Why Use Automated Reports?
Margill Loan Manager allows you to:
- Automatically generate reports, including Loan List reports, Transaction reports, and Document Merge (Invoices, Statements of Account, etc.).
- Produce reports covering different periods and formats (Excel, CSV, text, etc.).
- Automate file saving, email delivery, or secure FTP uploads.
- Run these processes on the schedule you define.
Step 1 — Access the Automated Reports Module
- From the Main window, open Reports.
- Click Automated Reports (under Personalized Reports).
You will see the list of existing automated report configurations. From here, you can create, edit, or delete report setups.
Step 2 — Create an Automated Report Configuration
Click New to open the configuration window.
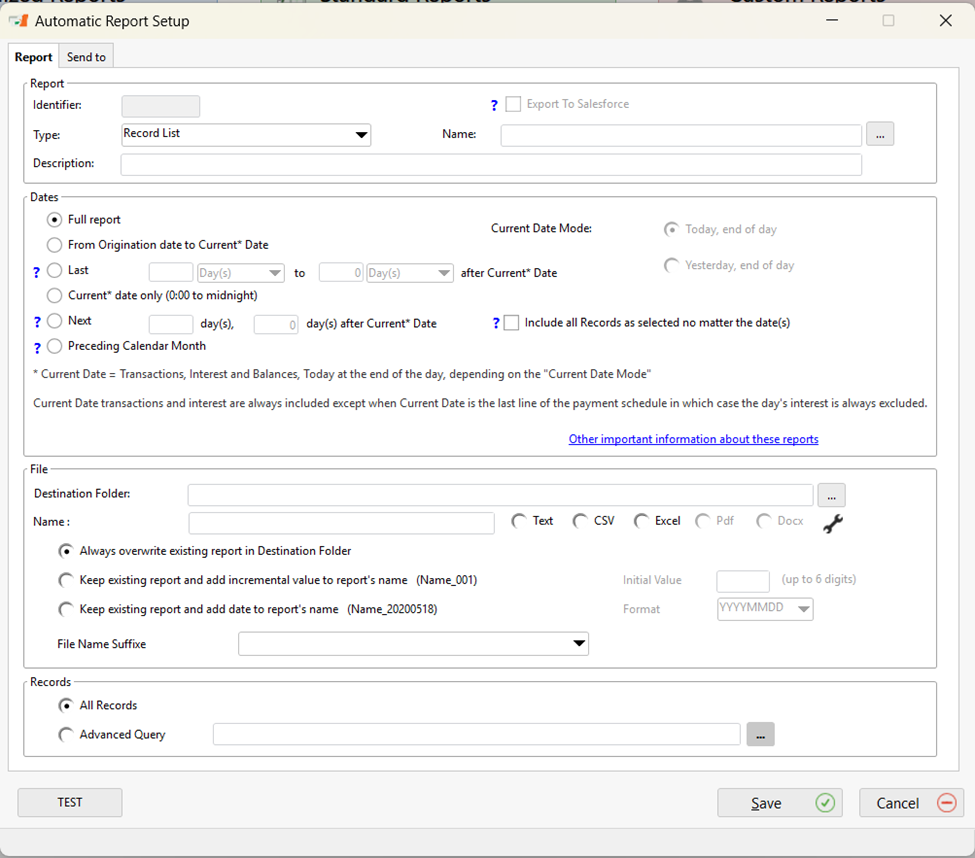
Key Fields to Complete
- Report Type
Select the type of report to generate:
- Record List
- Transaction Report
- Document Merge
- Report Name
Select an existing report from the list. If the report has not yet been created, first go to the Reports module to design your report template.
- Description
Enter a clear description to help identify the report in task activity logs.
- Report Period
Choose the period that best fits your needs:
- Full period
- From Origination date to Current Date
- Last X days
- Next X days, etc.
- Previous calendar month
The Current Date Mode (Today or Yesterday) must be adjusted based on the scheduled execution time.
- Records to Include
Select either All Records or an Advanced Query to target a specific set of Records.
Step 3 — Select File Format, Destination, and Delivery Options
File Destination and Format
- Destination Folder. Select a location accessible to the machine executing the automated task.
Note: In our SaaS environment, this option is not available. Use email or FTP delivery instead.
- File Format: Choose Excel, CSV, text, etc. Text and CSV formats allow you to define delimiters and other parameters.
File Version Management
You have three options:
- Overwrite the existing file at each execution.
- Keep previous files and add a sequential suffix.Keep previous files and add a sequential suffix.
- Keep previous files and add a date suffix.
Step 4 — Send by Email or FTP
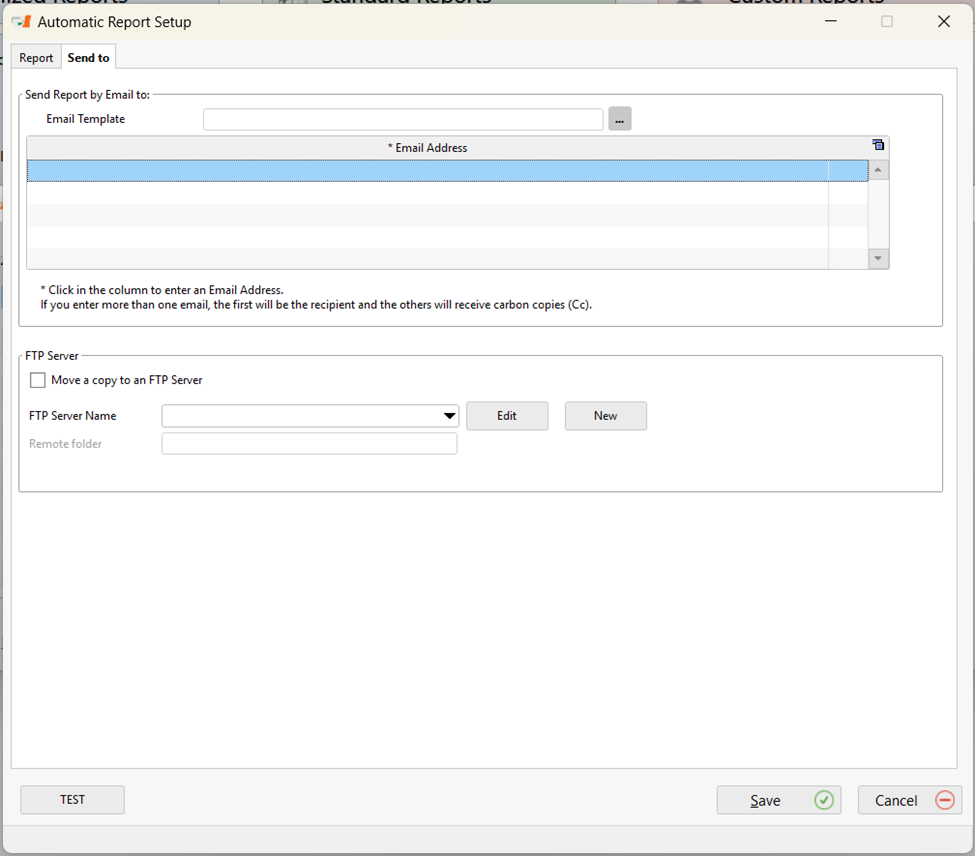
Email Delivery
Under the Send To tab:
- Select an existing Email Template.
- Add recipient email addresses. The first recipient receives the main email; additional recipients are added as CC.
Email Connection must be configured beforehand in Tools > Settings > Email Connection.
Uploading a Copy to an FTP Server
You can automatically copy the report to an FTP or secure FTP server by enabling Move a copy to an FTP server and configuring the server details.
Use the Test Connection button to validate the setup.
Step 5 — Test Before Automating
The Test button immediately generates the report using the same parameters as the scheduled task:
- Verify the format, content, date coverage, and Record selection.
- Confirm correct email delivery or file storage in the configured folder.
Always test your configurations before enabling automation.
Step 6 — Schedule in Windows
Each automated report is assigned a unique identifier when created. To activate automated execution:
- Open Windows Task Scheduler.
- Add the following argument to the command line or script associated with the task:
REPORTS=ID
Example: REPORTS=5
For multiple reports: REPORTS=1;3;5
Important: Without this argument, automated report generation will not run.
See the article dedicated exclusively to configuring automated reports in Windows Task Scheduler
Summary
The automated reporting feature in Margill Loan Manager helps optimize operations, save time, and ensure reliable, consistent distribution of critical information. With precise configuration and proper testing, your reports will run exactly as needed, without manual intervention.