Margill Loan Manager – Update of Borrower’s data with Global Changes and an Excel sheet
Question: I must make sure that all my loans include a name, address, city, province (or state), postal code (or Zip) and country for the Borrowers in a specific format. How can I do that in Margill?
Answer: This operation can be done quickly with Global Changes via an Excel sheet.
Steps:
- Create a personalized template in Reports > Record List with all the data that needs to be verified and updated, making sure to include the Unique ID for the Borrower in the first column:
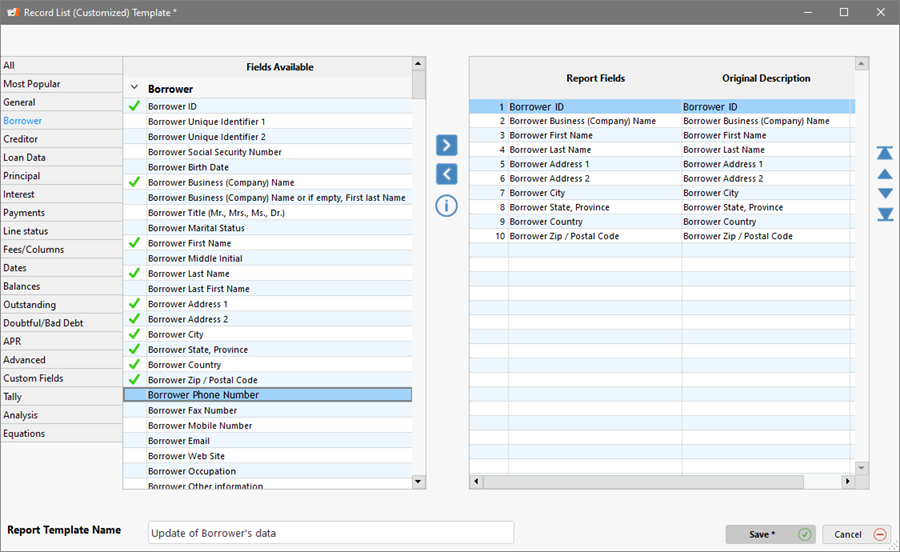
2) Create the report for all Records (you can exclude the archived or closed loans – Use Advanced Queries to include the desired loans in order to reduce the size of the report if you have thousands of loans.). Produce the report.

Export data to Excel:

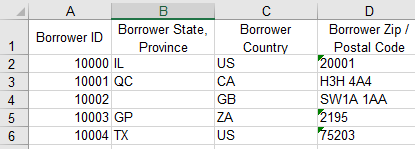
3) Clean up the Excel sheet.
- Lines 5 and 6 do not have Borrowers. Either add a Borrower or eliminate the lines.
- Duplicated lines (we can easily see them in column A) can all be eliminated – these people have many loans – we only want Borrowers, not loans.
- Here is the result after the clean-up including the State and Country that now have 2 standard letters:

In my situation, I only need to update the State/Province, the Country and the Postal Code. I therefore eliminate everything that should not be updated in my Excel sheet while absolutely keeping the Borrower Unique Identifier which is the “key”, allowing me to link my Excel sheet to the correct Borrower.
You would have tens, hundreds or thousands of Borrowers for real:
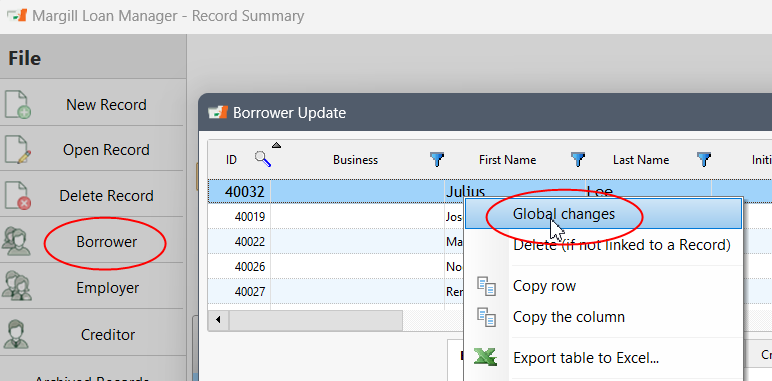
4) Update the columns one by one via Global Changes for Borrowers:
In the Main Margill window, go to Borrower under File > right click on the mouse > Global Changes:
Click on the Excel icon. The ? gives you additional instructions about the simple Excel sheet required.
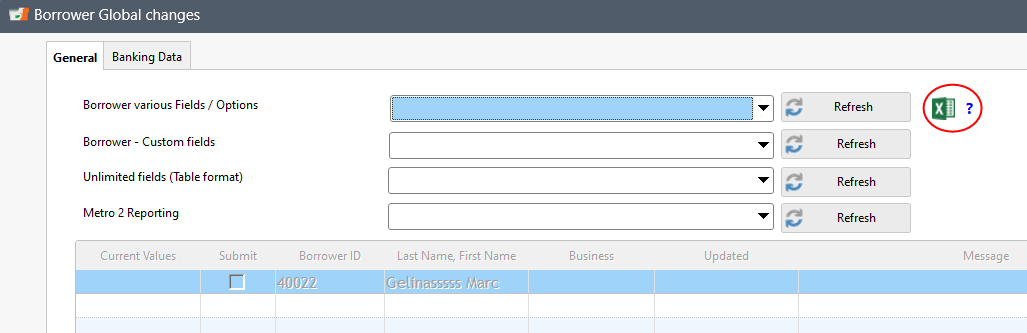
Column A is the Borrower Unique Identifier (not the loan) and Column B is the data to be imported or updated. In the first import, we want to change the State/Province and therefore in the right menu, choose “Borrower State, Province”. Then choose the Excel file by clicking on the orange file icon![]() .
.
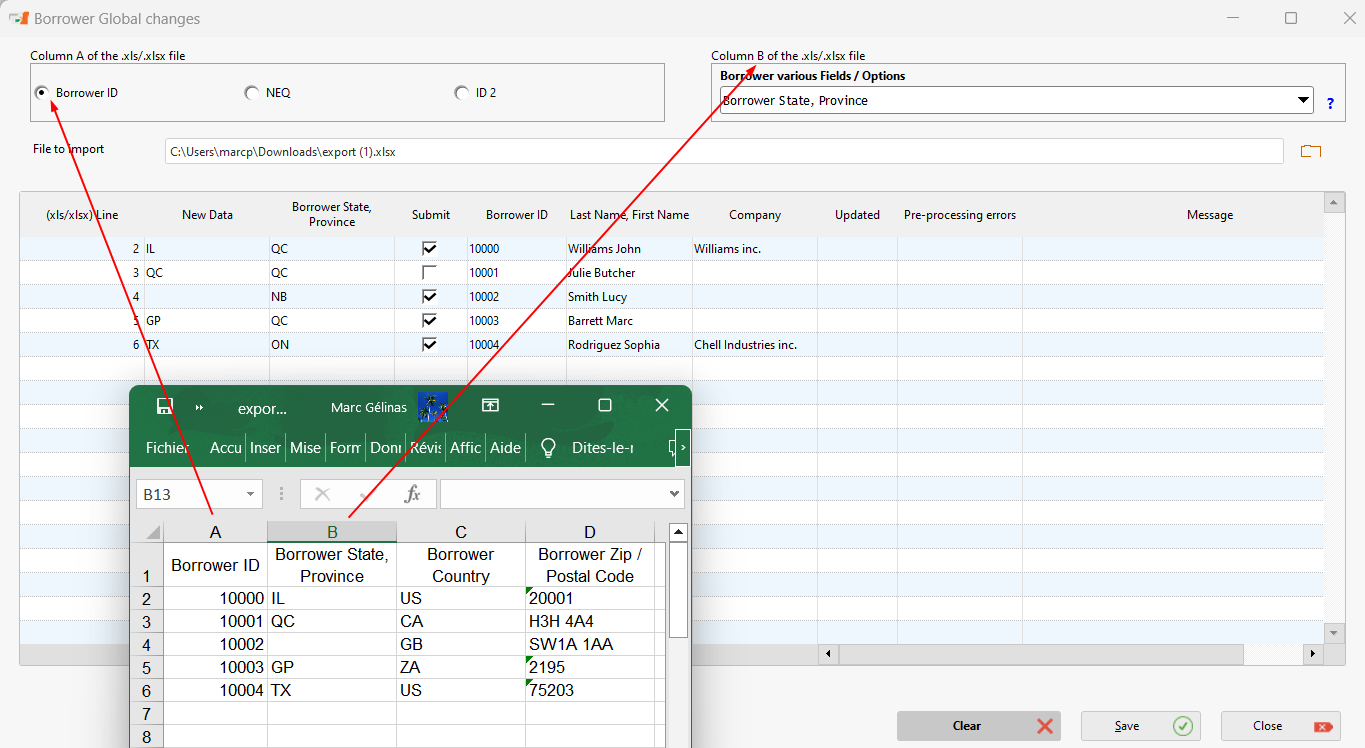
Note that for Borrower 10001, no update is required since the data is unchanged (the “Submit” column is therefore not checked).
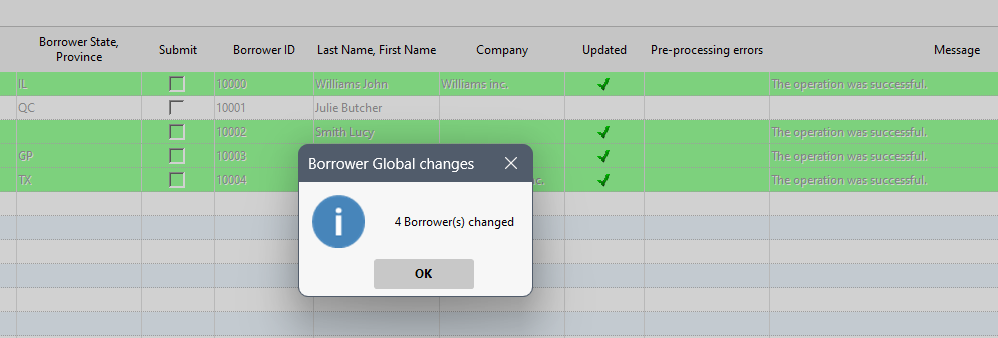
Click on “Save” and the data will be updated.
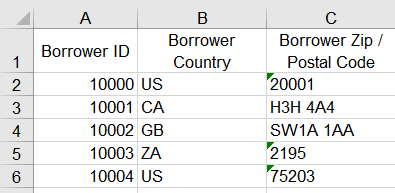
Afterwards, we want to update the Country. In Excel, copy the Country data into column B, save the sheet, then import (I simply deleted the State/Province column but it is wise not to destroy the columns or make a copy of the Excel sheet before deleting data). Do the same for the Postal Code/ZIP and other data as needed, one by one.
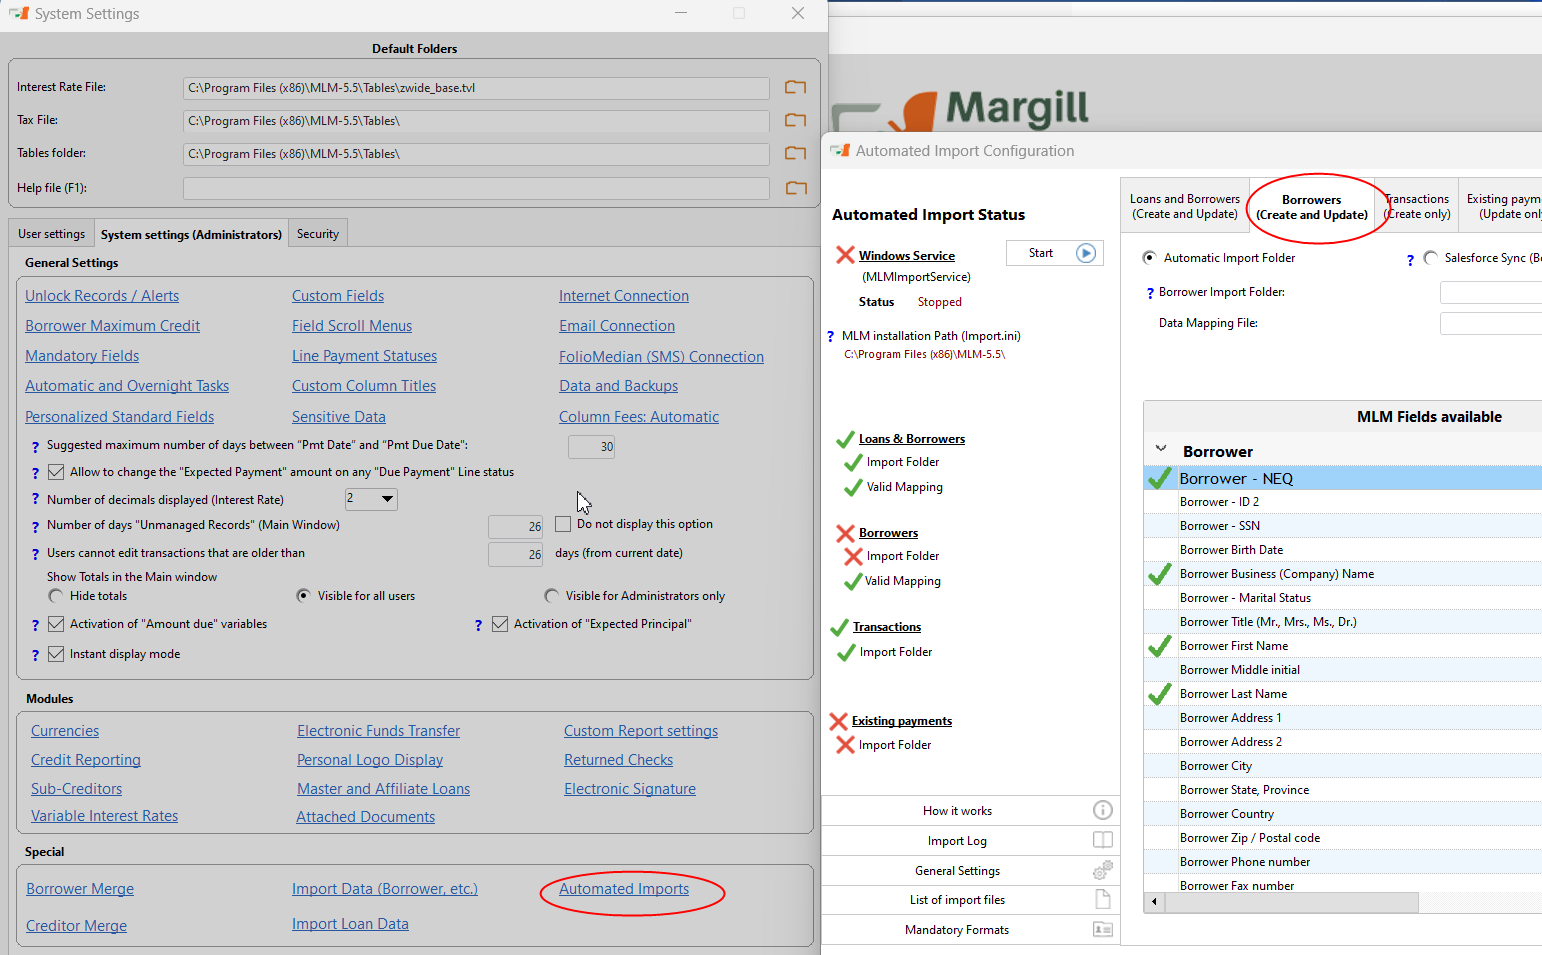
Note that the “Automated Imports” (API) would allow you to update all this data in one operation. There is also a Salesorce API available (not covered here):